こんにちは。現役エンジニアの”はやぶさ”@Cpp_Learningです。
今回は機械学習に関する図や資料づくりに役立つサンプルやツールを紹介します。
ML Visuals
ML Visuals とは、機械学習コミュニティの健全な発展を支援するために、無償で使える100種類以上の図を公開しているGoogleスライドです。
図をダウンロードして、そのまま使うも良し、編集して使うも良しです。下図のように自由にプレゼン資料やブログに張り付けることができます。
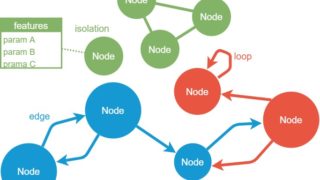
CNNやNNのアーキテクチャ図
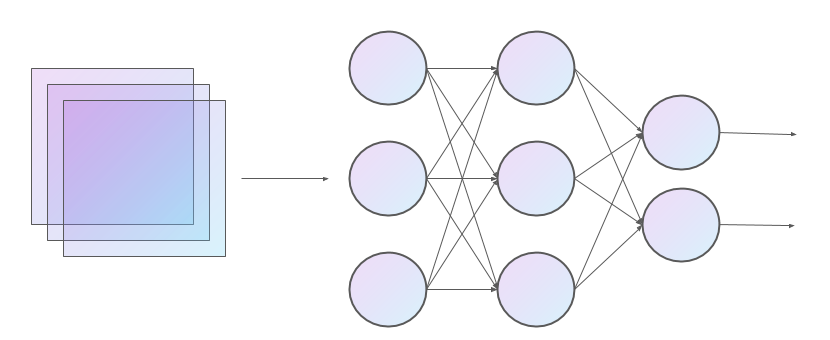
- NN:Neural Network(ニューラルネットワーク)
- CNN:Convolutional Neural Network(畳み込みニューラルネットワーク)
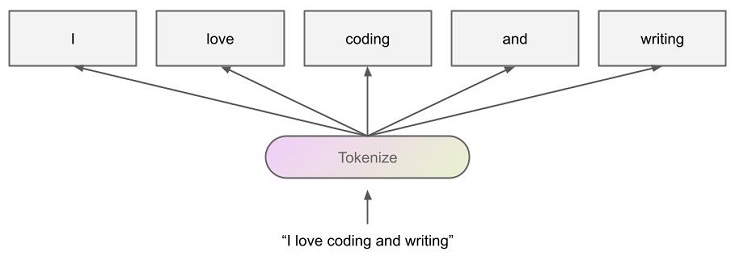
自然言語処理
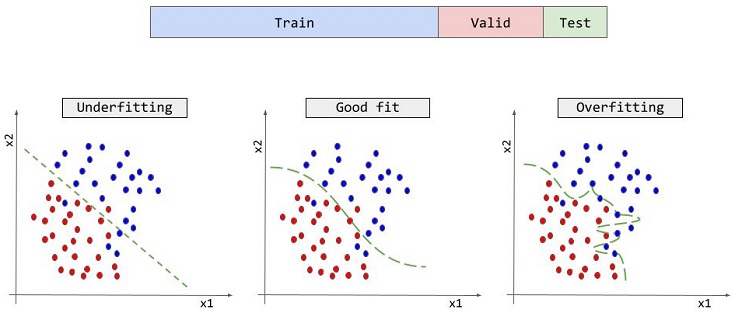
データセット分割やアンダーフォット、オーバーフィットの図解
draw.io
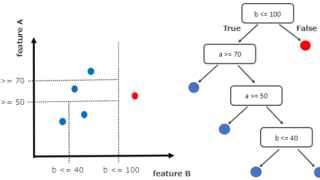
draw.io とは、フローチャートやネットワーク図、UML などを描くための高機能作図ツールです。
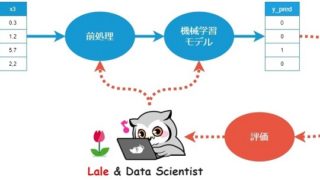
以下の記事にあるグラフやパイプライン(ワークフロー図)は draw.io で作図しました。
開発体制に合わせて、好きな draw.io を使用して下さい。
NN-SVG
NN-SVGとは、NNやCNNのアーキテクチャ図をインタラクティブに作成できるツールです。機械学習リサーチャーの時短や教育のサポートを目的としたツールなので、無償で使うことができます。
オンラインで作成した図はsvgファイルでエクスポートして、そのまま下図のようにWebサイトなどに貼り付けることができます。
NN-SVGで作図したCNN
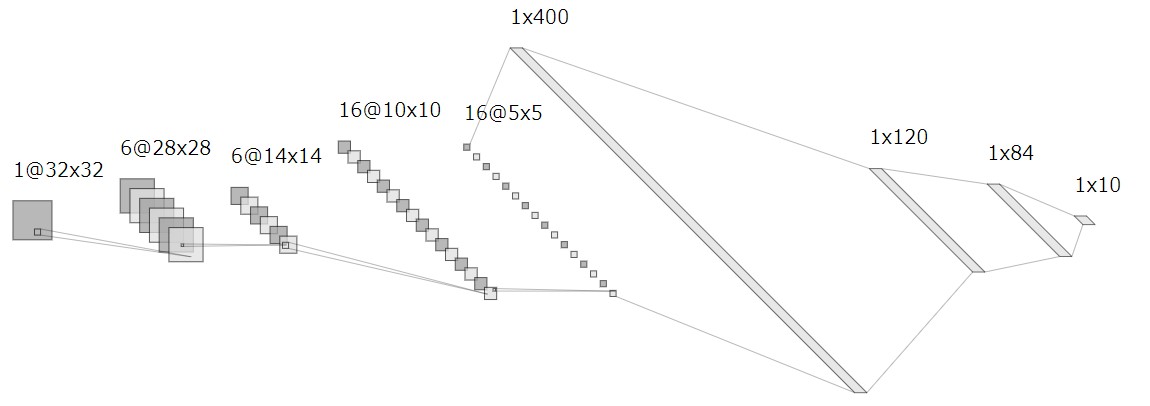
※上図はsvgをjpgに変換してから張り付けています
VSCode + Markdown Preview Enhanced
機械学習アプリなどの README や スライド を Markdown のみで作成するなら、VSCode + Markdown Preview Enhanced がオススメです。
参考までに、以下の記事に関する README やスライドを作成したので、公開します。
README
以下が作成した”README.md”です。
|
1 2 3 4 5 6 7 8 9 10 11 12 13 14 15 16 17 18 19 20 21 22 23 24 25 26 27 28 29 30 31 32 33 34 35 36 37 38 39 40 41 42 43 44 45 46 47 |
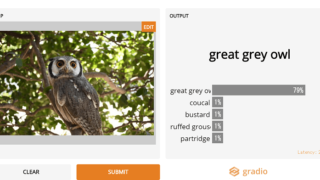
# ML_SamplePy "ML_SamplePy" is a tutorial of Deep Learning with Python. ## Demo You will develop image classification applications. 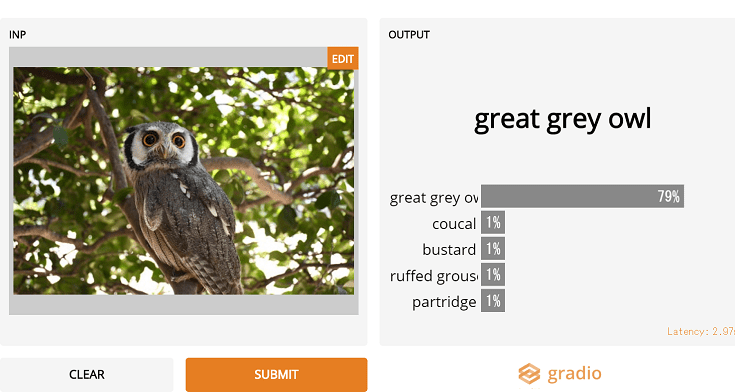 ## Features You can develop web applications in `3 minutes` by using [Gradio](https://github.com/gradio-app/gradio). ## Requirement * python >= 3.7 * gradio ## Installation Install gradio with pip command. ```bash pip install gradio ``` ## Usage For more information, please visit [here](https://cpp-learning.com/gradio/). ## Note Sample code is tested in `jupyter notebook` (and google colab) . ## Author * Hayabusa * R&D Center * Twitter : https://twitter.com/Cpp_Learning ## License "ML_SamplePy" is under [MIT license](https://en.wikipedia.org/wiki/MIT_License). |
GitHubなどに公開しときのイメージは、以下から確認できます。
READMEなにそれ?どうやって書くの?という人は以下の記事を参考にして下さい。

スライド
以下が作成した”Slide.md”です。
|
1 2 3 4 5 6 7 8 9 10 11 12 13 14 15 16 17 18 19 20 21 22 23 24 25 26 27 28 29 30 31 32 33 34 35 36 37 38 39 40 41 42 43 44 45 46 47 48 49 50 51 52 53 54 55 56 57 58 59 60 61 62 63 64 65 66 67 68 69 70 71 72 73 74 75 76 77 78 79 80 81 82 83 84 85 86 87 88 89 90 91 92 93 94 95 96 97 98 99 100 101 102 103 104 105 106 107 108 109 110 111 112 113 114 115 116 117 118 119 120 121 122 123 124 125 126 127 128 129 130 131 132 133 134 135 136 137 138 139 140 141 142 143 144 145 146 147 148 149 150 151 152 153 154 155 156 157 158 159 160 161 162 163 164 165 166 167 168 169 170 171 172 173 174 175 176 177 178 179 180 181 182 183 184 185 186 187 188 189 190 191 192 193 194 195 196 197 198 199 200 201 202 203 204 205 206 207 208 209 210 211 212 213 214 215 216 217 218 219 220 221 222 223 |
--- presentation: # プレゼンテーションのテーマ # === 使用可能なテーマ === # "beige.css" # "black.css" # "blood.css" # "league.css" # "moon.css" # "sky.css" # "solarized.css" # "white.css" # "none.css" # "night.css" # "serif.css" # "simple.css" theme: night.css # プレゼンテーションの「通常の」サイズ、アスペクト比は、 # プレゼンテーションが異なる解像度に合うように拡大縮小されたときに # 保持されます。パーセント単位で指定できます。 width: 960 height: 700 # コンテンツの周りで空のままにしておくべきディスプレイサイズの係数 margin: 0.1 # コンテンツに適用できる最小/最大の拡大倍率 minScale: 0.2 maxScale: 1.5 # 右下隅にコントロールを表示 controls: true # プレゼンテーションの進行状況バーを表示する progress: true # 現在のスライドのページ番号を表示 slideNumber: true # スライドの各変更をブラウザの履歴にプッシュする history: false # ナビゲーションのキーボードショートカットを有効にする keyboard: true # スライド概要モードを有効にする overview: true # スライドの垂直方向の中央揃え center: true # タッチ入力を備えたデバイスでタッチナビゲーションを有効にする touch: true # プレゼンテーションをループする loop: false # 文字方向を右から左(RTL)に変更する rtl: false # プレゼンテーションが読み込まれるたびにスライドの順序をランダム化する shuffle: false # フラグメントをグローバルにオン/オフにします fragments: true # プレゼンテーションが埋め込みモードで実行する、 # 例: 画面の限られた部分に埋め込む embedded: false # ?キーが押されたときにヘルプオーバーレイを表示する help: true # スピーカーノートをすべての視聴者に表示するかどうか showNotes: false # 次のスライドに自動的に進むまでのミリ秒。 # 0に設定すると無効になります。 # この値はスライドのdata-autoslide属性を使用して上書きできます autoSlide: 0 # ユーザー入力後に自動スライドを停止する autoSlideStoppable: true # マウスホイールによるスライドナビゲーションを有効にする mouseWheel: false # モバイルデバイスのアドレスバーを非表示にする hideAddressBar: true # iframeプレビューオーバーレイでリンクを開く previewLinks: false # 遷移スタイル transition: "default" # none/fade/slide/convex/concave/zoom # 遷移速度 transitionSpeed: "default" # default/fast/slow # ページ全体のスライドの背景の遷移スタイル backgroundTransition: "default" # none/fade/slide/convex/concave/zoom # 現在のスライドから表示するスライドの数 viewDistance: 3 # 視差背景画像 parallaxBackgroundImage: "" # 例: "'https://s3.amazonaws.com/hakim-static/reveal-js/reveal-parallax-1.jpg'" # 視差背景サイズ parallaxBackgroundSize: "" # CSS構文, 例: "2100px 900px" - 現在のところ、Pixelのみサポートされています。(%とautoは使用しないでください) # スライドごとに視差背景を移動するピクセル数 # - 指定されない限り自動的に計算されます # - 軸に沿った移動を無効にするには0に設定します parallaxBackgroundHorizontal: 200 parallaxBackgroundVertical: 50 # スピーカーノートを有効にする enableSpeakerNotes: false --- <!-- slide --> ## ML_SamplePy "ML_SamplePy" is a tutorial of Deep Learning with Python. <!-- slide --> ## Demo You will develop image classification applications.  <!-- slide --> ## Features You can develop web applications in `3 minutes` by using [Gradio](https://github.com/gradio-app/gradio). <!-- slide --> ## Requirement * python >= 3.7 * gradio <!-- slide --> ## Installation Install gradio with pip command. ```bash pip install gradio ``` <!-- slide --> ## Create DL App -Step 1- ### Import ```python import gradio as gr import torch from torchvision import transforms import requests from PIL import Image ``` ### Ioad model ```python model = torch.hub.load('zhanghang1989/ResNeSt', 'resnest50', pretrained=True) model.eval() response = requests.get("https://git.io/JJkYN") labels = response.text.split("\n") ``` <!-- slide --> ## Create DL App -Step 2- ### Predict ```python def predict(inp): inp = Image.fromarray(inp.astype('uint8'), 'RGB') inp = transforms.ToTensor()(inp).unsqueeze(0) with torch.no_grad(): prediction = torch.nn.functional.softmax(model(inp)[0], dim=0) return {labels[i]: float(prediction[i]) for i in range(1000)} ``` ### Make & Run UI ```python inputs = gr.inputs.Image() outputs = gr.outputs.Label(num_top_classes=5) interface = gr.Interface(fn=predict, inputs=inputs, outputs=outputs) interface.launch() ``` <!-- slide --> ## Usage For more information, please visit [here](https://cpp-learning.com/gradio/). <!-- slide --> ## Note Sample code is tested in `jupyter notebook` (and google colab) . <!-- slide --> ## Author * Hayabusa * R&D Center * Twitter : https://twitter.com/Cpp_Learning <!-- slide --> ## License "ML_SamplePy" is under [MIT license](https://en.wikipedia.org/wiki/MIT_License). |
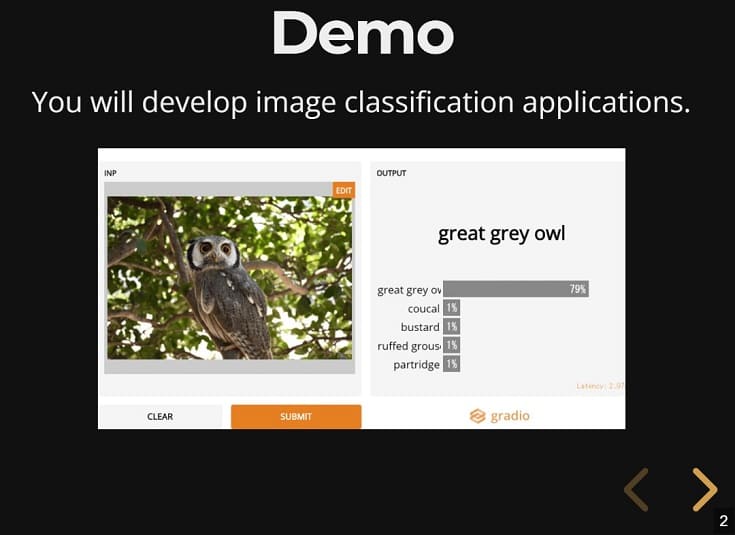
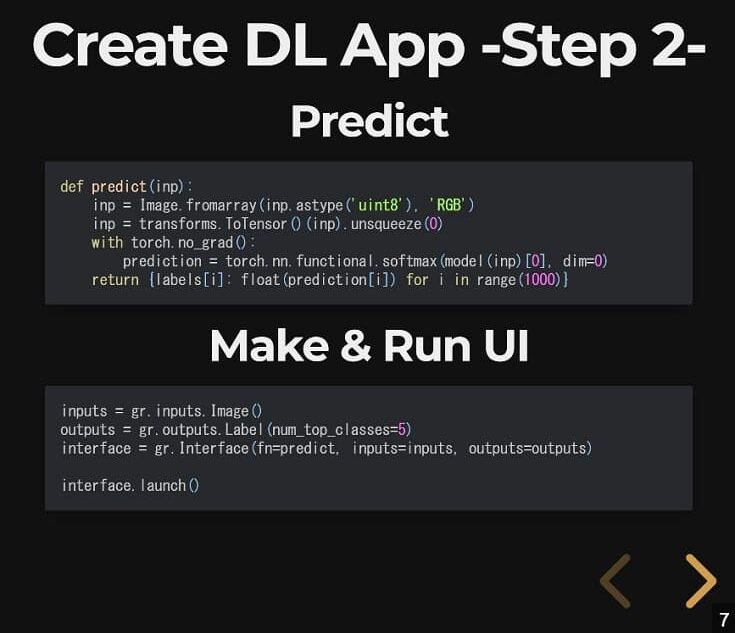
このコードで作成したスライドの一部が下図です。
Markdown Preview Enhancedで作成したスライド

今回は未使用ですが、PlantUML や Mermaid なども扱えるので、簡単な作図ならコードのみで完結できます。
PlantUMLで作成できる図の例

PlantUMLの”UML”って何?という人は以下の記事を参考にしてください。

ツールの使い分け
ケースバイケースですが、ツールの使い分けの例も紹介します。
- まずは ML Visuals を確認
- 簡単な図は、ML Visuals を参考にしつつ、draw.io で作図
- 詳細なCNNやNNの作図には、NN-SVG を使用
- コードのみで作図するなら、PlantUML、mermaid などを使用
- READMEやスライド作成には、Markdown Preview Enhanced を使用