こんにちは。
コンピュータビジョン(『ロボットの眼』開発)が専門の”はやぶさ”@Cpp_Learningです。
『深層学習による物体検出』が好きで色んな記事を書いてます↓
ChainerやPyTorchを使う機会が多いのですが、今回はMicrosoft社製OSSのONNX Runtimeを使って物体検出を実践します。
Contents
ONNXとは
ONNXとはOpen Neural Network Exchangeの略称で、深層学習フレームワークなどで生成された学習済みモデルのためのフォーマットです。
各深層学習フレームワークが独自フォーマットの学習済みモデルではなく、ONNX形式を採用することで、学習済みモデルの交換を簡単に実現することができます。
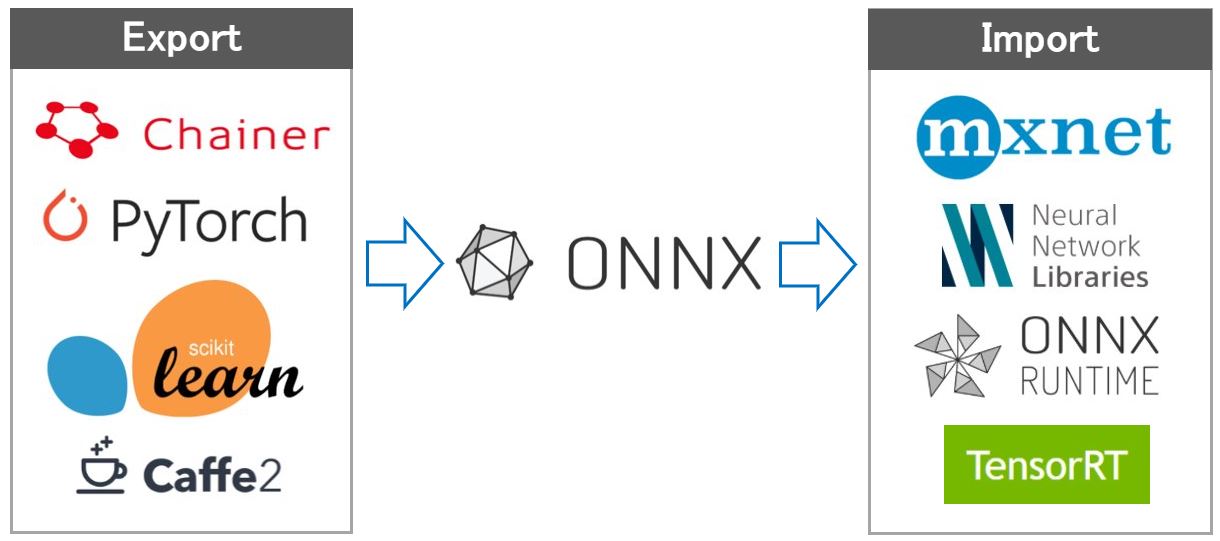
例えば、Chainerでは「HDF5形式」と「NPZ形式」の2種類のフォーマットで学習済みモデルを保存できますが、onnx-chainerを使うことで、ONNX形式のモデルを出力することもできます。
一方、MXNetはONNX-MXNet APIがあり、ONNX形式のモデルの入出力ができます。
つまり、ONNXを使うことで、Chainerで学習したモデルをMXNetで使う!といったツール間の移動(モデルの交換)を簡単に実現することができます。
ONNXをサポートしているフレームワークについては、公式サイトなどで確認できます。
ONNX Runtimeとは
ONNX RuntimeとはONNXモデルに特化した推論エンジンです。推論専用という意味で、ChainerのMenohやNVIDIAのTensorRTの仲間です。
2019/07/08時点、ONNX Runtimeがサポートしている言語(API)は以下の通りです。
環境構築
ONNX Runtime(Python API)を使うための環境構築について説明します。
今回はAnaconda for Windowsを採用しました。Anacondaのインストール方法や基本的な使い方については、下記記事をご参照ください。

最初に、以下のコマンドで仮想環境を生成後、アクティブにします。
conda create -n onnxruntime pip python
activate onnxruntime
続いて、以下のコマンドでONNX Runtimeをインストールします。
pip install onnxruntime
その他のモジュールもインストールします。
pip install numpy
pip install Pillow
pip install matplotlib
以降で説明するソースコードは以下のバージョンで動作確認しました。
- Python==3.7
- onnxruntime==0.4.0
- numpy==1.16.4
- Pillow==6.0.0
- matplotlib==3.1.0
2019/07/08時点、onnxruntimeはPython3.5~Python3.7をサポートしています。
実践!ONNX RuntimeとYoloV3で物体検出
以降からONNX Runtimeの使い方を説明します。ONNX Model Zoo の中からChainerCVで実践したYoloV3モデルを見つけたので…
今回は『ONNX RuntimeとYoloV3でリアルタイム物体検出』を実践します。

ONNXRuntime_YoloV3.py開発
ONNX Model ZooからダウンロードしたYoloV3モデルの説明がONNX_YoloV3にあります。これを参照しながら作成したソースコード”ONNXRuntime_YoloV3.py”が以下です。
|
1 2 3 4 5 6 7 8 9 10 11 12 13 14 15 16 17 18 19 20 21 22 23 24 25 26 27 28 29 30 31 32 33 34 35 36 37 38 39 40 41 42 43 44 45 46 47 48 49 50 51 52 53 54 55 56 57 58 59 60 61 62 63 64 65 66 67 68 69 70 71 72 73 74 75 76 77 78 79 80 81 82 83 84 85 86 87 88 89 90 91 92 93 94 95 96 97 98 99 100 101 102 103 104 105 106 107 108 109 110 111 112 113 114 115 116 117 118 119 120 121 122 123 124 |
import onnxruntime import numpy as np from PIL import Image, ImageDraw import matplotlib.pyplot as plt # coco labels list coco_labels = ('person', 'bicycle', 'car', 'motorcycle', 'airplane', 'bus', 'train', 'truck', 'boat', 'traffic light', 'fire hydrant', 'stop sign', 'parking meter', 'bench', 'bird', 'cat', 'dog', 'horse', 'sheep', 'cow', 'elephant', 'bear', 'zebra', 'giraffe', 'backpack', 'umbrella', 'handbag', 'tie', 'suitcase', 'frisbee', 'skis', 'snowboard', 'sports ball', 'kite', 'baseball bat', 'baseball glove', 'skateboard', 'surfboard', 'tennis racket', 'bottle', 'wine glass', 'cup', 'fork', 'knife', 'spoon', 'bowl', 'banana', 'apple', 'sandwich', 'orange', 'broccoli', 'carrot', 'hot dog', 'pizza', 'donut', 'cake', 'chair', 'couch', 'potted plant', 'bed', 'dining table', 'toilet', 'tv', 'laptop', 'mouse', 'remote', 'keyboard', 'cell phone', 'microwave', 'oven', 'toaster', 'sink', 'refrigerator', 'book', 'clock', 'vase', 'scissors', 'teddy bear','hair drier', 'toothbrush') def letterbox_image(image, size): '''resize image with unchanged aspect ratio using padding''' iw, ih = image.size w, h = size scale = min(w/iw, h/ih) nw = int(iw*scale) nh = int(ih*scale) image = image.resize((nw,nh), Image.BICUBIC) new_image = Image.new('RGB', size, (128,128,128)) new_image.paste(image, ((w-nw)//2, (h-nh)//2)) return new_image # Resized image (1x3x416x416) Original image size (1x2) which is [image.size[1], image.size[0]] def preprocess(img): model_image_size = (416, 416) boxed_image = letterbox_image(img, tuple(reversed(model_image_size))) image_data = np.array(boxed_image, dtype='float32') image_data /= 255. image_data = np.transpose(image_data, [2, 0, 1]) image_data = np.expand_dims(image_data, 0) return image_data def main(): # Load image image = Image.open('img/owl.jpg') # Resized image_data = preprocess(image) image_size = np.array([image.size[1], image.size[0]], dtype=np.int32).reshape(1, 2) # Check # print(type(image_data)) # print(image_data) ''' The model has 3 outputs. boxes: (1x'n_candidates'x4), the coordinates of all anchor boxes, scores: (1x80x'n_candidates'), the scores of all anchor boxes per class, indices: ('nbox'x3), selected indices from the boxes tensor. The selected index format is (batch_index, class_index, box_index). ''' # 1. Make session session = onnxruntime.InferenceSession('model/yolov3/yolov3.onnx') # 2. Get input/output name input_name = session.get_inputs()[0].name # 'image' input_name_img_shape = session.get_inputs()[1].name # 'image_shape' output_name_boxes = session.get_outputs()[0].name # 'boxes' output_name_scores = session.get_outputs()[1].name # 'scores' output_name_indices = session.get_outputs()[2].name # 'indices' # 3. run outputs_index = session.run([output_name_boxes, output_name_scores, output_name_indices], {input_name: image_data, input_name_img_shape: image_size}) output_boxes = outputs_index[0] output_scores = outputs_index[1] output_indices = outputs_index[2] # Result out_boxes, out_scores, out_classes = [], [], [] for idx_ in output_indices: out_classes.append(idx_[1]) out_scores.append(output_scores[tuple(idx_)]) idx_1 = (idx_[0], idx_[2]) out_boxes.append(output_boxes[idx_1]) print(out_classes) # 14=bird print(out_scores) print(out_boxes) # Make Figure and Axes fig = plt.figure() ax = fig.add_subplot(1, 1, 1) caption = [] draw_box_p = [] for i in range(0, len(out_classes)): box_xy = out_boxes[i] p1_y = box_xy[0] p1_x = box_xy[1] p2_y = box_xy[2] p2_x = box_xy[3] draw_box_p.append([p1_x, p1_y, p2_x, p2_y]) draw = ImageDraw.Draw(image) # Draw Box draw.rectangle(draw_box_p[i], outline=(255, 0, 0), width=5) caption.append(coco_labels[out_classes[i]]) caption.append('{:.2f}'.format(out_scores[i])) # Draw Class name and Score ax.text(p1_x, p1_y, ': '.join(caption), style='italic', bbox={'facecolor': 'white', 'alpha': 0.7, 'pad': 10}) caption.clear() # Output result image img = np.asarray(image) ax.imshow(img) plt.show() if __name__ == '__main__': main() |
以下のコマンドで動作確認できます。
python ONNXRuntime_YoloV3.py
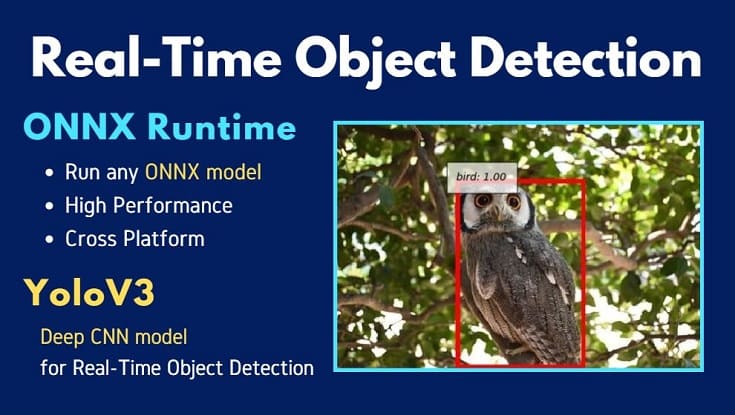
出力画像はChainerCVを意識した表示にしました。
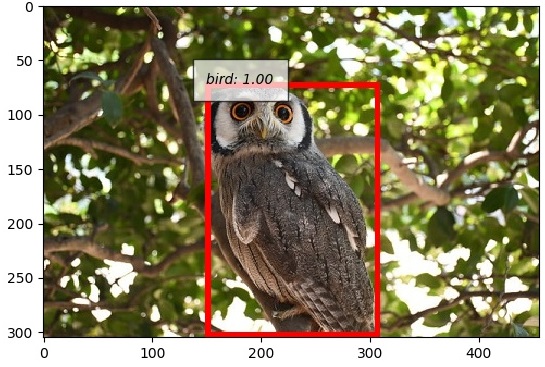
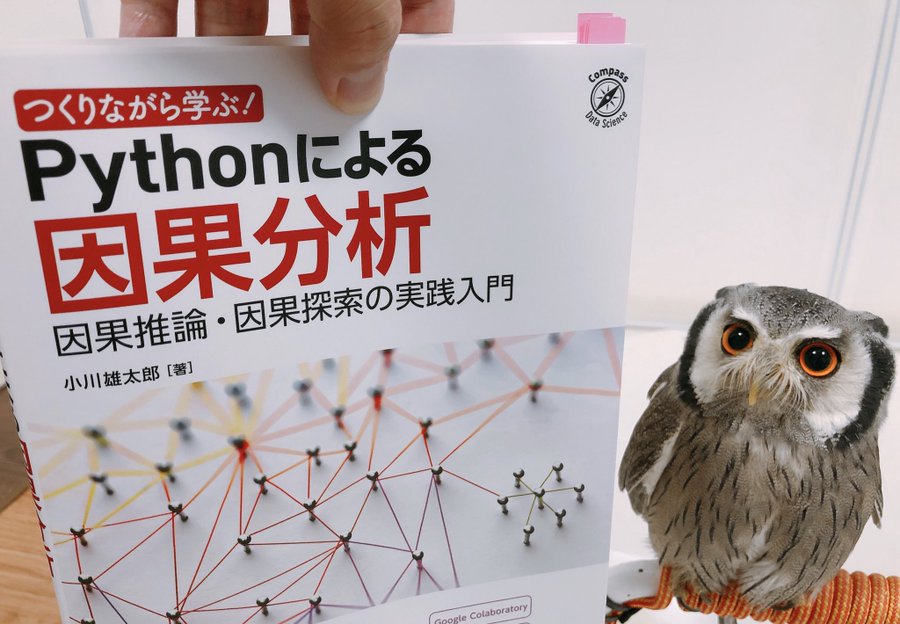
フクロウのくるるちゃん@kururu_owl をちゃんと検出できてますね…可愛い!!
ソースコードのパス設定を任意に変更してください
- 43行目:画像パス
- 61行目:ONNXモデルパス
ONNXRuntime_YoloV3.pyの解説
”ONNXRuntime_YoloV3.py”を作成する前にJupyter Notebookで各種検討を実施した『技術ノート』があるので公開します。
資料としてはもちろん、チュートリアルとしても活用できると思うので、自由に使って下さい。
まとめ
本記事は以下の文章構成で説明しました。
- 【前半】ONNXおよびONNX Runtimeの概要説明
- 【後半】ONNX RuntimeとYoloV3による物体検出
深層学習や画像処理などを勉強している人が…
- ONNXについて知りたい
- 推論エンジンを使ったリアルタイム処理に興味がある
- ONNX Runtimeで物体検出などを実践したい
などを想いながら本記事にたどり着き、”ONNXRuntime_YoloV3.py”や『技術ノート(Jupyter Notebook)』を参考にしてくれた最高に嬉しいです!
