こんにちは。
コンピュータビジョン(『ロボットの眼』開発)が専門の”はやぶさ”@Cpp_Learningです。
『深層学習による物体検出』が好きで色んな記事を書いています。
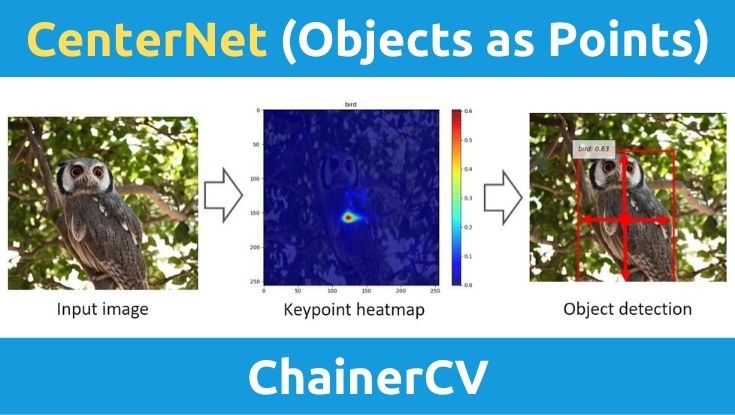
今回は、キーポイント検出ベースの物体検出手法:CenterNet (Objects as Points)を使って物体検出ソフトを作りました。
Contents
YoloやSSDなどの従来手法 -矩形領域を学習・予測-
物体検出とは、画像内の「どの座標に何が写っているか?」に対する解を得るための手法です。
YoloやSSDなどの物体検出手法では、画像とbounding box(物体の位置情報)を教師データとして学習することで、物体検出を実現しています。
bounding box(物体の位置情報)は、アノテーションと呼ばれる作業で定義(生成)します。
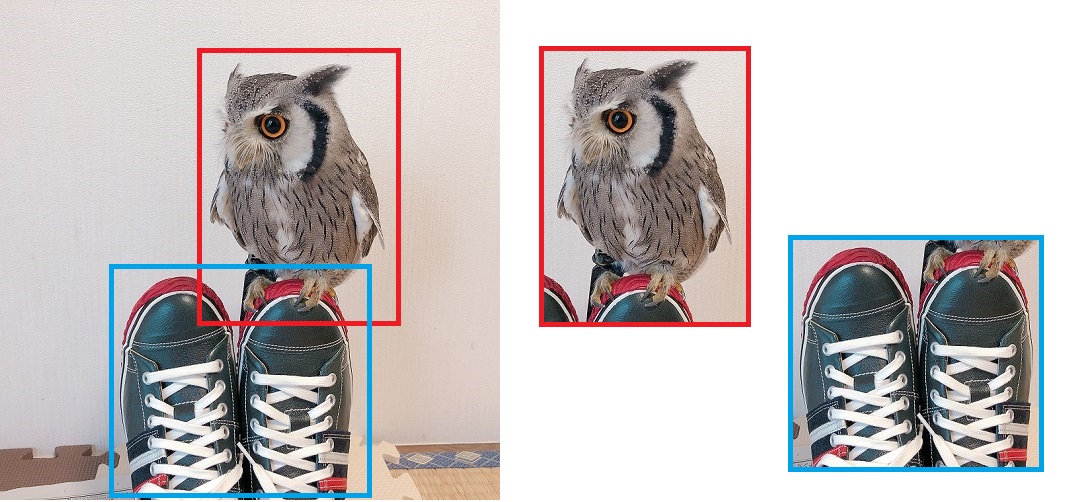
上の図はアノテーション作業でフクロウと靴のbounding boxを定義しているイメージ図です。
bounding boxの定義についてはケースバイケースですが、下記のように矩形領域の左上と右下の座標およびラベルを定義するケースがあります。
左上座標:(320, 50), 右下座標:(580, 300), ラベルID:14 (クラス名:bird)
このようなbounding box(矩形領域)を学習するため、物体検出を実施する推論フェーズでは、物体ごとの矩形領域を予測することになります。
CenterNetとは
従来の矩形領域を予測する物体検出手法では、無数にあるbounding box候補からフィッティングするものを選択する処理が必要になります(下記 ”YoloV2解説”が参考になります)。
このような矩形領域の予測は、無駄の多い非効率的な処理といえます。この問題を解消し、高速な物体検出を実現したのが、キーポイント検出ベースの物体検出手法です。
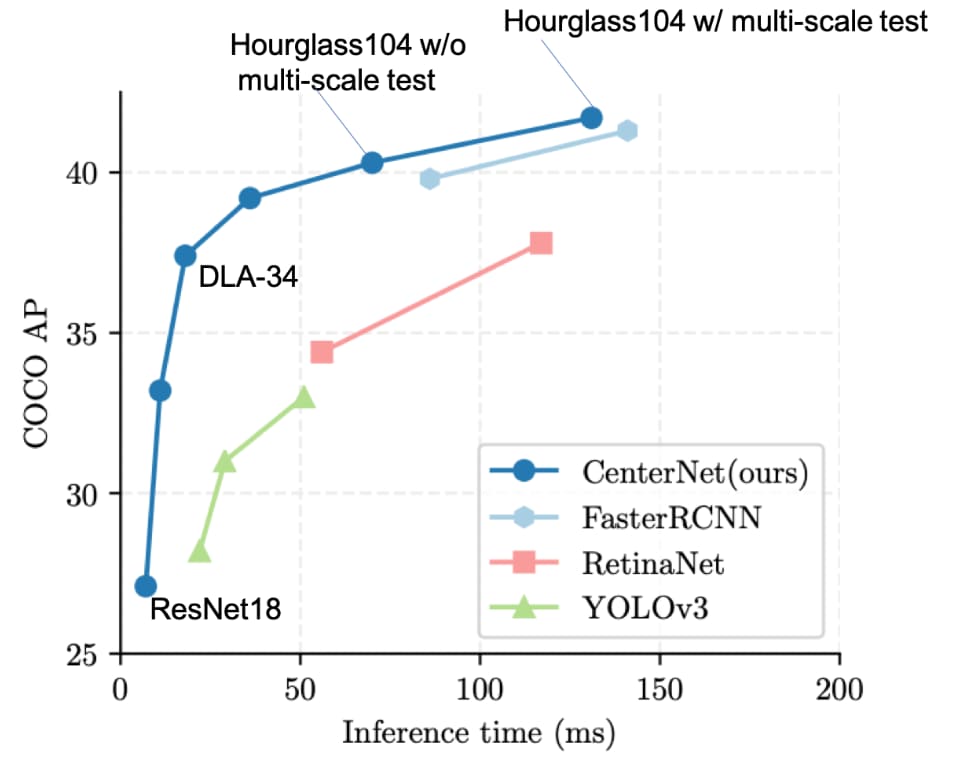
上図を見るとYoloV3よりもCenterNetの方が速くて精度も良いことが分かります。
CenterNet -ヒートマップを学習・予測-
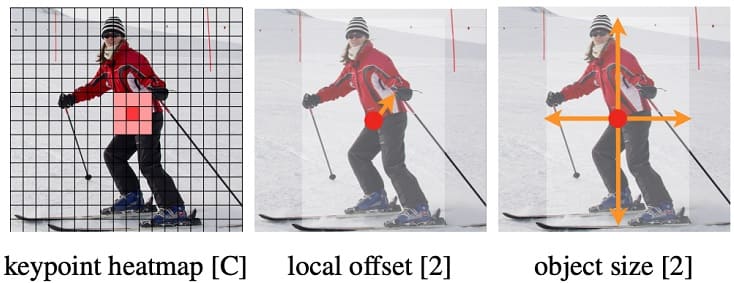
CenterNetでは、ガウシアンカーネルを用いてヒートマップを生成し、そのヒートマップの特徴とbounding box(矩形領域)のサイズなどを学習します。
物体検出を実施する推論フェーズでは、入力画像のヒートマップから、物体の中心点(ヒートマップのピーク)を予測し、その中心点の特徴から対象のサイズを推定します。

つまり、入力画像のヒートマップを予測し、そのヒートマップの特徴(特に中心点:キーポイント)から画像内の「どの座標に何が写っているか?」を推定しています。
CenterNetは物体検出だけでなく、3D物体検出や姿勢検出にも応用できます。ただし、本記事では物体検出についてのみ説明しました
実践!CenterNetで物体検出
CenterNetの本家はPytorch実装です。そのほか、Keres実装などもありますが、本記事では以下のChainer実装を採用します。
と聞かれると少し困りますが、素直に回答すると…
ですね。論文や本家のソースコードを参考にChainerなどで再現実装する人がいて、しかもGitHubやブログなどで作成したソースコードを公開してくれる!すごい世の中ですね。感謝!!
環境構築
Chainerを使った物体検出ソフト用の環境構築(Windows編)については、以下の記事に書いたので、ご参照下さい。

基本的には以下のコマンドで必要なパッケージをインストールすればOKです。
pip install [パッケージ名]
本記事では、以下のパッケージをインストールして動作確認しました。
- Python 3.7
- Chainer 6.4.0
- ChainerCV 0.13.0
- OpenCV 4.1.1
Chainer-CenterNetで物体検出 -静止画編-
chainer-centernet|GitHubリポジトリは以下のようなフォルダ構成になっています。
chainer-centernet
├─centernet
│ ├─datasets
│ ├─functions
│ ├─models
│ │ └─networks
│ └─utilities
├─data
│ └─demo
├─scripts
└─tests
READMEに従い学習済みモデルをダウンロード(download)し、modelsフォルダ(無いので先に作る)に保存します。
chainer-centernet
├─centernet
│ ├─datasets
│ ├─functions
│ ├─models
│ │ └─networks
│ └─utilities
├─data
│ └─demo
├─models
├─scripts
└─tests
あとは、visualize.pyを実行(run)すれば、直ぐに静止画に対しCenterNetによる物体検出を実践できます。
Chainer-CenterNetで物体検出 -カメラ・動画編-
静止画だけでなく、カメラ・動画に対してもCenterNetによる物体検出を実践したかったので、ソースコードを自作しました。
|
1 2 3 4 5 6 7 8 9 10 11 12 13 14 15 16 17 18 19 20 21 22 23 24 25 26 27 28 29 30 31 32 33 34 35 36 37 38 39 40 41 42 43 44 45 46 47 48 49 50 51 52 53 54 55 56 57 58 59 60 61 62 63 64 65 66 67 68 69 70 71 72 73 74 75 76 77 78 79 80 81 82 83 84 85 86 87 88 89 90 91 92 93 94 95 96 97 98 99 100 101 102 103 104 105 106 107 108 109 110 111 112 113 114 115 116 117 118 119 120 121 122 123 124 125 126 127 128 129 130 131 132 133 134 135 136 137 138 139 140 |
import argparse import matplotlib.pyplot as plt import cv2 import numpy as np from timeit import default_timer as timer import chainer from chainer.dataset import concat_examples from chainer.functions.activation.sigmoid import sigmoid from chainercv.datasets import voc_bbox_label_names, VOCBboxDataset from chainercv.visualizations import vis_bbox from centernet.datasets.transforms import CenterDetectionTransform from centernet.models.center_detector import CenterDetector from centernet.models.networks.hourglass import HourglassNet def main(): parser = argparse.ArgumentParser() parser.add_argument('-threshold', type=float, default=0.3) parser.add_argument('video') args = parser.parse_args() # Preprocess size = 256 transform = CenterDetectionTransform(size, 100, 4) num_class = len(voc_bbox_label_names) detector = CenterDetector(HourglassNet, size, num_class) # Load the model chainer.serializers.load_npz('models/hg_256_pascalvoc.npz', detector) # Set threshold th = args.threshold # Load the webcam handler if args.video == "0": cap = cv2.VideoCapture(0) else: cap = cv2.VideoCapture(args.video) if not cap.isOpened(): raise ImportError("Couldn't open video file or webcam.") # Compute aspect ratio of video vidw = cap.get(cv2.CAP_PROP_FRAME_WIDTH) vidh = cap.get(cv2.CAP_PROP_FRAME_HEIGHT) vidw = int(vidw) vidh = int(vidh) print(vidw) print(vidh) # Time parameter accum_time = 0 curr_fps = 0 fps = "FPS: ??" prev_time = timer() frame_count = 1 while True: # Load frame from the camera ret, frame = cap.read() if ret == False: print("Done!") return # Result image result_img = frame.copy() # BGR -> RGB rgb = cv2.cvtColor(frame, cv2.COLOR_BGR2RGB) # (H, W, C) -> (C, H, W) img = np.asarray(rgb, dtype = np.float32).transpose((2, 0, 1)) # Object Detection predicted = detector.predict([img], detail=True) thresh_idx = predicted[2][0] > th bboxes = predicted[0][0][thresh_idx] class_IDs = predicted[1][0][thresh_idx] scores = predicted[2][0][thresh_idx] # Display the result image if len(bboxes) != 0: for i, bbox in enumerate(bboxes): class_id = class_IDs[i] score = scores[i] ymin = int(bbox[0]) xmin = int(bbox[1]) ymax = int(bbox[2]) xmax = int(bbox[3]) # Draw box cv2.rectangle(result_img, (xmin, ymin), (xmax, ymax), (0,255,0), 2) text = voc_bbox_label_names[class_id] + " " + ('%.2f' % score) print(text) text_top = (xmin, ymin - 10) text_bot = (xmin + 80, ymin + 5) text_pos = (xmin + 5, ymin) # Draw class and score cv2.rectangle(result_img, text_top, text_bot, (255,255,255), -1) cv2.putText(result_img, text, text_pos, cv2.FONT_HERSHEY_SIMPLEX, 0.35, (0, 0, 0), 1) # Calculate FPS curr_time = timer() exec_time = curr_time - prev_time prev_time = curr_time accum_time = accum_time + exec_time curr_fps = curr_fps + 1 if accum_time > 1: accum_time = accum_time - 1 fps = "FPS: " + str(curr_fps) curr_fps = 0 # Draw FPS in top right corner cv2.rectangle(result_img, (vidw-50, 0), (vidw, 17), (0, 0, 0), -1) cv2.putText(result_img, fps, (vidw-45, 10), cv2.FONT_HERSHEY_SIMPLEX, 0.35, (255, 255, 255), 1) # Draw Frame Number in top left corner cv2.rectangle(result_img, (0, 0), (50, 17), (0, 0, 0), -1) cv2.putText(result_img, str(frame_count), (0, 10), cv2.FONT_HERSHEY_SIMPLEX, 0.35, (255, 255, 255), 1) # Output Result title = "CenterNet Result" cv2.imshow(title, result_img) # Stop Processing if cv2.waitKey(1) & 0xFF == ord('q'): break frame_count += 1 if __name__ == '__main__': main() |
visualize.pyをベースにカメラ・動画対応させたので、このコードに”visualize_cam.py”という名前を付けました。
visualize.py同様にscriptsに保存しても良いのですが、今回は以下の場所に”visualize_cam.py”を保存しました。
chainer-centernet
├─centernet
│ ├─datasets
│ ├─functions
│ ├─models
│ │ └─networks
│ └─utilities
├─data
│ └─demo
├─models
├─visualize_cam.py
├─tests
└─scripts
└─visualize.py
『visualize_cam.py』の使い方
パーサーで以下の項目を設定してから、”visualize_cam.py”を実行します。
| 設定項目 | 記号 | 選択候補 |
| スコア閾値 | –threshold | ボックス描画したいスコアの下限値 |
| カメラ・動画モード選択 | 末尾に設定 | カメラなら”0” 動画ならファイルパス |
いくつか例を示します。
【使用例1】 カメラモードで物体検出(デフォルト設定)
以下のコマンドでWebカメラによる物体検出を試せます。
python visualize_cam.py 0
※スコア閾値=0.3がデフォルト設定
【使用例2】 動画モードで物体検出(デフォルト設定)
以下のコマンドで好きな動画に対し物体検出を試せます。
python python visualize_cam.py [VideoPath]
【使用例3】カメラモードで物体検出(スコア閾値指定)
以下のコマンドでスコア閾値=0.5などに変更できます。
python python visualize_cam.py -threshold 0.5 0
動画の場合は以下の通りです。
python python visualize_cam.py -threshold 0.5 [VideoPath]
キーボードの”q”を押すと停止し、動画の場合は動画が終れば自動停止します。
動作確認
”visualize_cam.py”でフクロウを検出したときの様子が以下の動画です。
※この映像は20fpsで再生しています。
第8世代となるインテルCoreプロセッサ(Core i5-8250U)で動かしましたが、処理速度は1fps(右上に表示)でした。
以下で試したYoloV3と同じ結果ですね。

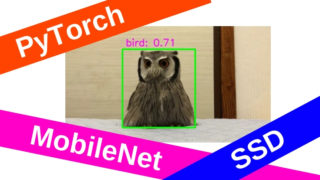
以下で試したMobileNetV1-SSDが約3fpsなのでCPUではCenterNetの本領を発揮できなかったと考えられます。

(GPUで遊んでみたい…)
まとめ
ChainerCVとCenterNetでキーポイントによる物体検出ソフトを作りました。カメラ・動画に対し、手軽に物体検出を試せるので良かったら遊んでみて下さい。
深層学習によるリアルタイム物体検出の分野はYoloやSSDの登場により、ある程度”成熟”した気がしていましたが…
キーポイント検出ベースの物体検出手法が登場したことで、まだまだ底が見えないと感じており、とても”ワクワク”しています。
今後も物体検出について調査したり、試したものについては、ブログ記事にまとめて公開したいと考えています。

