こんにちは。
現役エンジニアの”はやぶさ”@Cpp_Learningです。仕事でもプライベートでも機械学習で色々やってます。
今回は可読性の良いテンソル演算を実現できる”einops”を紹介します。
Contents
対象読者
本記事で学べる内容は以下の通りです。
- NumPy, JAX, PyTorch, TensorFlowの違いを吸収したTensor演算
- 可読性の良いTensor演算コードの書き方
- Tensor演算と画像処理
以下の記事でNumPy, JAX, PyTorch, TensorFlowの違いを吸収できるライブラリ”EagerPy”について紹介しました。

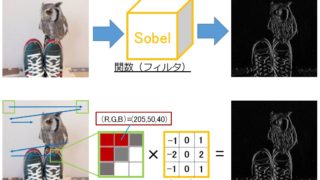
またTensor演算と画像処理については、以下の記事で説明済みです。
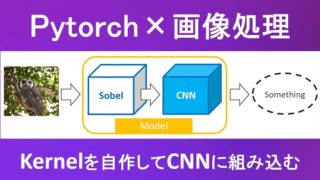
本記事は、上記の2記事をミックスしたような内容です。
einopsとは
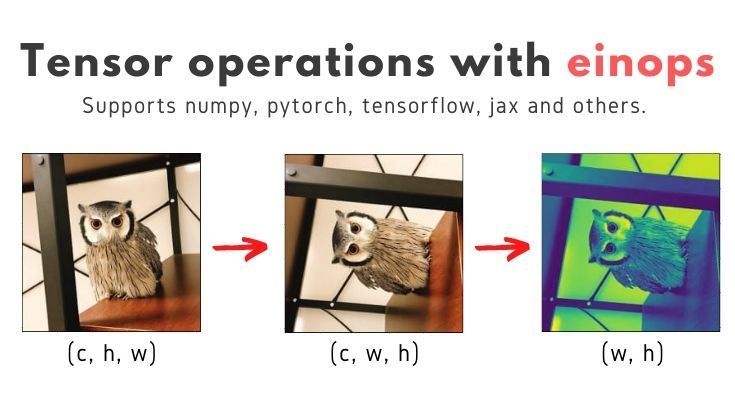
einopsの魅力はREADMEに埋め込まれた動画と以下の一言に尽きると思います。
Flexible and powerful tensor operations for readable and reliable code. Supports numpy, pytorch, tensorflow, and others.
引用元:einops|GitHub
なので多くを語らず、すぐ実践しましょう。
einopsによるTensor演算 -基礎編-
はじめに einops の基本的な使い方を紹介します。
- rearrange(再配置)
- reduce(削除)
- repeat(繰り返し)
インストール
最初に以下のコマンドで einops をインストールします。
pip install einops
あとはeinopsがサポートしているフレームワークの中から適当なものをインストールします。
本記事のソースコードはGoogle Colabで動作確認しました。複数のフレームワークやライブラリがインストール済みなので、とても便利です。
Import
最初はimportから
|
1 2 3 4 5 6 7 8 9 |
import numpy as np from PIL import Image import matplotlib.pyplot as plt import torch import tensorflow as tf import jax.numpy as jnp from einops import rearrange, reduce, repeat |
toy data
適当なデータ(Tensor)を作成します。
|
1 2 3 4 5 6 7 8 9 10 11 12 13 14 15 16 17 18 19 20 21 22 23 24 25 26 27 28 29 30 31 32 33 34 35 |
# numpy x = np.array([[[1, 2, 3], [4, 5, 6]], [[7, 8, 9], [10, 11, 12]], [[13, 14, 15], [16, 17, 18]], [[19, 20, 21], [22, 23, 24]]]) # jax xj = jnp.array([[[1, 2, 3], [4, 5, 6]], [[7, 8, 9], [10, 11, 12]], [[13, 14, 15], [16, 17, 18]], [[19, 20, 21], [22, 23, 24]]]) # numpy to PyTorch xt = torch.from_numpy(x) # numpy to TensorFlow xtf = tf.Variable(x) + 0 # print print("x.shape:", x.shape) print(x) # print("xj.shape:", xj.shape) # print(xj) # print("xt.shape:", xt.shape) # print(xt) # print("xtf.shape:", xtf.shape) # print(xtf) |
x.shape: (4, 2, 3)
[[[ 1 2 3]
[ 4 5 6]]
[[ 7 8 9]
[10 11 12]]
[[13 14 15]
[16 17 18]]
[[19 20 21]
[22 23 24]]]
このコードでフレームワークが違うだけで、中身が同じTensorを4つ作成できます。
einopsの基本機能 -rearrange(再配置)-
rearrange(再配置)を使えば、「Tensorの軸a, b, cのうち、c, bを入れ替える」などの操作が「’a b c -> a c b`」で実現できます。
つまり、以下のような可読性の良いコードで、rearrangeを実現でき、かつフレームワークの違いも吸収してくれます。
|
1 2 3 4 5 6 7 8 9 10 11 12 |
y = rearrange(x, 'a b c -> a c b') yj = rearrange(xj, 'a b c -> a c b') yt = rearrange(xt, 'a b c -> a c b') ytf = rearrange(xtf, 'a b c -> a c b') print("y.shape:", y.shape) print(y) # print("yj.shape:", yj.shape) # print(yj) # print("yt.shape:", yt.shape) # print(yt) # print("ytf.shape:", ytf.shape) # print(ytf) |
y.shape: (4, 3, 2)
[[[ 1 4]
[ 2 5]
[ 3 6]]
[[ 7 10]
[ 8 11]
[ 9 12]]
[[13 16]
[14 17]
[15 18]]
[[19 22]
[20 23]
[21 24]]]
x.shape: (4, 2, 3) -> y.shape: (4, 3, 2)になっています。
軸の数を操作
以下のように書けば、軸の数も操作できます。
|
1 2 3 |
y = rearrange(x, 'a b c -> a (b c)') print("y.shape:", y.shape) # (a, b*c) print(y) |
y.shape: (4, 6)
[[ 1 2 3 4 5 6]
[ 7 8 9 10 11 12]
[13 14 15 16 17 18]
[19 20 21 22 23 24]]
|
1 2 3 |
y = rearrange(x, 'a b c -> (a b c)') print("y.shape:", y.shape) # (a*b*c) print(y) |
y.shape: (24,)
[ 1 2 3 4 5 6 7 8 9 10 11 12 13 14 15 16 17 18 19 20 21 22 23 24]
einopsの基本機能 -reduce(削除)-
reduce(削除)を使うことで、パラメータの抽出や演算ができます。
|
1 2 3 4 |
y1 = reduce(x, 'a b c -> b c', 'max') y2 = reduce(x, 'a b c -> b c', 'min') print(y1) # (a, b, c)から(b, c)に再配置して、大きい数値のみ採用 print(y2) # (a, b, c)から(b, c)に再配置して、小さい数値のみ採用 |
[[19 20 21]
[22 23 24]]
[[1 2 3]
[4 5 6]]
rearrangeとreduceを組み合わせたシーケンス処理
以下のようなシーケンス処理もできます。
|
1 2 3 4 5 6 |
# Sequential input = x x1 = rearrange(input, 'a b c -> a c b') x2 = reduce(x1, 'a c b -> c b', 'min') output = reduce(x2, 'c b -> ', 'sum') print("input -> x1 -> x2 -> output =", output) |
input -> x1 -> x2 -> output = 21
einopsの基本機能 -repeat(繰り返し)-
repeat(繰り返し)を使えば、コピーしたパラメータを増やした軸に再配置できます。
|
1 2 |
y3 = repeat(x2, 'c b -> a c b', a=3) print(y3) # (c, b)をaの数だけコピーして、増やした軸に再配置 |
[[[1 4]
[2 5]
[3 6]]
[[1 4]
[2 5]
[3 6]]
[[1 4]
[2 5]
[3 6]]]
以上までの内容が基本編です。
einopsによるTensor演算と画像処理 -応用編-
以降からは応用編になります。学べる内容は以下の通りです。
- Tensor演算と画像処理(PyTorchベース)
- einopsで深層学習
Import
基本編でimportしたモジュールに加え、応用編では以下のモジュールを追加します。
|
1 2 3 |
from torch.nn import Sequential, Conv2d, MaxPool2d, Linear, ReLU from torchvision import models, transforms from einops.layers.torch import Rearrange |
画像読込み
まずは以下のコードで画像を読み込みます。
|
1 2 3 |
image = Image.open('/content/owl.jpg') plt.imshow(image); # 描画 # print(image.size) # 256×256 |
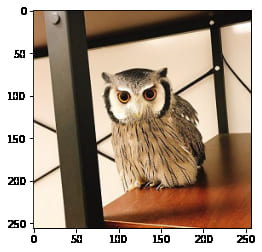
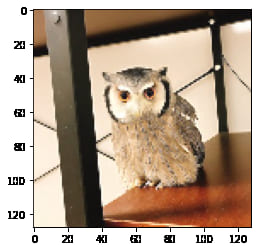
本サイトのサンプル画像といえば、フクロウの”くるる”ちゃん”@kururu_owl です。
描画関数
Pytorchで画像処理の記事でも紹介した「画像(tensor)を描画する関数」を作成します。
|
1 2 3 4 5 6 7 |
def imshow(tensor: torch.tensor): image = tensor.clone().detach() # copy image = image.squeeze(0) # remove the fake batch dimension unloader = transforms.ToPILImage() # reconvert into PIL image image = unloader(image) plt.imshow(image) plt.pause(0.001) # pause a bit so that plots are updated |
rearrangeで軸の入れ替え
Pytorchで画像処理の記事では、torchvision.transforms で軸の入れ替えをしましたが、今回は einops を使います。
|
1 2 3 4 5 6 7 8 9 10 11 12 13 |
# numpy image = np.asarray(image, np.float32) / 255 print(image.shape) # (h, w, c) # numpy to PyTorch image_t = torch.from_numpy(image) # transforms axis img_t = rearrange(image_t, 'h w c -> c h w') print(img_t.shape) # (c, h, w) # draw image imshow(img_t) |
transformsによる画像処理(前処理)はとても簡単ですが…
と感じているフクロウがいるかも(?)einopsを使えば、どんな操作(h w c -> c h w で軸の入れ変え)をしたのかが、とても分かり易いです。
縦と横を入れ替え
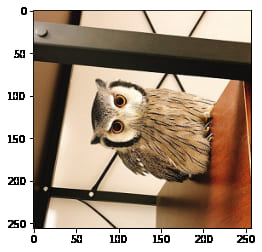
画像の縦と横を入れ替えるコードは以下の通りです(c h w -> c w h)。
|
1 2 3 4 5 6 |
# transforms axis output_img = rearrange(img_t, 'c h w -> c w h') print(output_img.shape) # (c, w, h) # draw image imshow(output_img) |
グレースケール化
RGBの3chを1chにすれば、グレースケール化ができます。3ch -> 1ch の方法は色々ありますが、例えば各成分の平均をとる場合は、以下のコードで実現できます。
|
1 2 3 4 5 6 |
# (r+g+b)/3 output_img2 = reduce(img_t, 'c h w -> h w', 'mean') print(output_img2.shape) # (w, h) # draw image imshow(output_img2) |
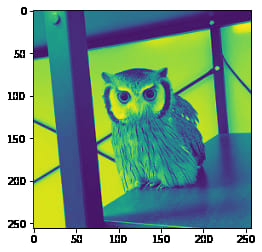
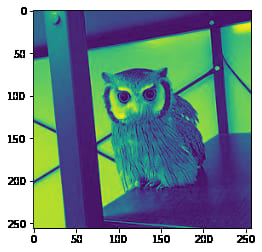
‘mean’の部分を’max’や’min’に変えるだけで、色んなのグレースケール化を実現できます。
|
1 2 3 4 5 6 |
# max output_img3 = reduce(img_t, 'c h w -> h w', 'max') print(output_img3.shape) # (w, h) # draw image imshow(output_img3) |
|
1 2 3 4 5 6 |
# min output_img3 = reduce(img_t, 'c h w -> h w', 'min') print(output_img3.shape) # (w, h) # draw image imshow(output_img3) |
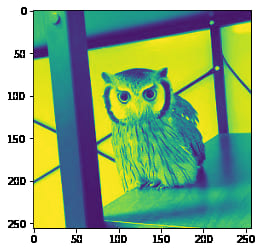
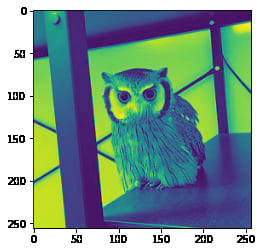
‘max’だと暗い、’min’だと明るいなら、これらの平均をとるのが良さそうですね。
|
1 2 3 |
# (max + min) / 2 output_img4 = (output_img2 + output_img3) / 2 imshow(output_img4) |
max-pooling
深層学習でよく使う処理も einops で書くことができます。例えば max-pooling は以下のコードで実現できます。
|
1 2 3 4 |
# 2d max-pooling with kernel size = 2 * 2 for image processing output_img5 = reduce(img_t, 'c (h h1) (w w1) -> c h w', reduction='max', h1=2, w1=2) # output_img5 = reduce(img_t, 'c (h 2) (w 2) -> c h w', 'max') # 上のコードと同じ imshow(output_img5) |
flattening(全結合)
c, h, wの3次元データを1次元に変換する処理も書けます。
|
1 2 3 4 5 6 |
# ミニバッチ追加 batch_img = repeat(img_t, 'c h w -> b c h w', b=1) print(batch_img.shape) # CNN -> NN への全結合 output_img6 = rearrange(batch_img, 'b c h w -> b (c h w)') print(output_img6.shape) |
※CNN -> NN に全結合するための処理
チャンネル数や画像サイズが分かっていれば、可逆処理(元に戻すこと)もできます。
|
1 2 3 |
output_img7 = rearrange(output_img6, 'b (c h w) -> b c h w', c=3, h=256, w=256) print(output_img7.shape) imshow(output_img7) |
以上までの内容が『Tensor演算と画像処理 -応用編-』です。
einopsによるTensor演算と深層学習 -応用編-
最後に『Tensor演算と深層学習 -応用編-』を説明しますが、既に材料は揃っています。
einops には各深層学習フレームワーク用のAPIが存在します(下記コード参照)。
|
1 2 3 4 5 |
from einops.layers.chainer import Rearrange, Reduce from einops.layers.gluon import Rearrange, Reduce from einops.layers.keras import Rearrange, Reduce from einops.layers.torch import Rearrange, Reduce from einops.layers.tensorflow import Rearrange, Reduce |
これらを活用すれば、どの深層学習フレームワークを使っても、ほとんど同じコードでニューラルネットワークを設計できます。
CNN設計
今回は einops × PyTorch で、簡単なCNNを組んでみます。
|
1 2 3 4 5 6 7 8 9 10 11 12 13 14 |
# example given for pytorch, but code in other frameworks is almost identical model = Sequential( Conv2d(3, 6, kernel_size=5), MaxPool2d(kernel_size=2), Conv2d(6, 16, kernel_size=5), MaxPool2d(kernel_size=2), # flattening Rearrange('b c h w -> b (c h w)'), Linear(16*5*5, 120), ReLU(), Linear(120, 10), ) print(model) |
上記のコードをちょこっと修正。
|
1 2 3 4 5 6 7 8 9 10 11 12 |
# example given for pytorch, but code in other frameworks is almost identical model = Sequential( Conv2d(3, 6, kernel_size=5), MaxPool2d(kernel_size=2), Conv2d(6, 16, kernel_size=5), # combined pooling and flattening in a single step Reduce('b c (h 2) (w 2) -> b (c h w)', 'max'), Linear(16*5*5, 120), ReLU(), Linear(120, 10), ) |
ResNet
最後にResNetを紹介しておきます。
|
1 2 3 4 5 6 7 8 9 10 11 12 13 14 15 16 17 18 19 20 21 22 23 24 25 26 27 28 29 30 31 32 33 34 35 36 37 38 39 40 41 42 |
def make_layer(inplanes, planes, block, n_blocks, stride=1): downsample = None if stride != 1 or inplanes != planes * block.expansion: # output size won't match input, so adjust residual downsample = nn.Sequential( nn.Conv2d(inplanes, planes * block.expansion, kernel_size=1, stride=stride, bias=False), nn.BatchNorm2d(planes * block.expansion), ) return nn.Sequential( block(inplanes, planes, stride, downsample), *[block(planes * block.expansion, planes) for _ in range(1, n_blocks)] ) def ResNetNew(block, layers, num_classes=1000): e = block.expansion resnet = nn.Sequential( Rearrange('b c h w -> b c h w', c=3, h=224, w=224), nn.Conv2d(3, 64, kernel_size=7, stride=2, padding=3, bias=False), nn.BatchNorm2d(64), nn.ReLU(inplace=True), nn.MaxPool2d(kernel_size=3, stride=2, padding=1), make_layer(64, 64, block, layers[0], stride=1), make_layer(64 * e, 128, block, layers[1], stride=2), make_layer(128 * e, 256, block, layers[2], stride=2), make_layer(256 * e, 512, block, layers[3], stride=2), # combined AvgPool and view in one averaging operation Reduce('b c h w -> b c', 'mean'), nn.Linear(512 * e, num_classes), ) # initialization for m in resnet.modules(): if isinstance(m, nn.Conv2d): n = m.kernel_size[0] * m.kernel_size[1] * m.out_channels m.weight.data.normal_(0, math.sqrt(2. / n)) elif isinstance(m, nn.BatchNorm2d): m.weight.data.fill_(1) m.bias.data.zero_() return resnet |
他にも色んな例があるので、einopsの公式サイトをチェックして下さいね。
まとめ
長文読解お疲れさまでした。少しマニアックな内容でしたが…楽しかったですか?参考になりましたか?
本記事がTensor・画像処理・深層学習の理解に少しでも役立ったなら、とても嬉しく思います。
最後に”おまけ”も書いたので、読んで頂けると嬉しいです。
おまけ -本ブログのサポートについて-
もし本記事が参考になり、ブログ『はやぶさの技術ノート』をサポートしたいという人がいれば、以下の方法でサポートして頂けると嬉しいです!
- 本ブログの記事をSNS(Twitterやfacebookなど)でシェア
- ブログをやっている人ならリンクを張ってシェア
- 本ブログで紹介した本などを購入
- LINEスタンプ 購入
- 【くるるの野望ショップ】でフクロウグッズ購入
私のプロフィールにも書いていますが、学生さんや勉強したい人の”学び”を支援したいと考えています。
ブログ『はやぶさの技術ノート』では本記事も含め、多くのチュートリアル記事を無料で公開しています。自由に活用して良いので、SNSなどで友達にも教えてあげてほしいです!
また応援メッセージなどを頂けると、次も良い記事書きたいな!というモチベーションに繋がります。Twitterなどで気軽にコメントして頂けると嬉しいです。

